

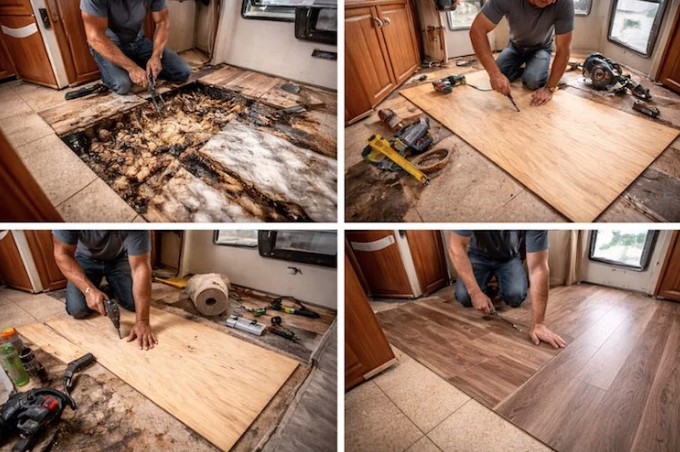
RV floor repair is one of those issues owners hope is minor, but it rarely is. RV floors are lightweight sandwich structures, not solid house floors. Once moisture, flexing, or age compromises them, the problem usually goes deeper than what you feel under your feet.
A soft floor is a symptom, not the problem itself.
How RV floors are actually built
Most RV floors consist of a thin top layer, lightweight wood or composite core, insulation, and a bottom barrier. Everything is glued together to save weight. This design works well when dry and intact, but it has little tolerance for moisture.
When water gets in, glue fails first. After that, the floor loses rigidity even before visible rot appears.
The most common causes of RV floor damage
Water intrusion is the leading cause. Roof leaks, window leaks, slide-out seals, plumbing failures, and even repeated condensation can introduce moisture into the floor structure. In many cases, the leak happened long before the soft spot was noticed.
Another cause is long-term flexing. Areas near entry doors, kitchens, bathrooms, and slide-outs see constant load and movement. Over time, fasteners loosen and the floor begins to sag.
Why covering the floor never fixes the problem
Many owners try to hide floor damage with vinyl plank, laminate, or carpet. This almost always makes things worse. Trapped moisture continues to spread, and added flooring weight increases stress on already weakened areas.
A proper RV floor repair requires access to the damaged structure, not hiding it.
Inspection comes before repair
Real floor repair starts by finding the source of the damage. This means checking roof seams, slide seals, plumbing, and exterior penetrations. Repairing the floor without stopping the leak guarantees failure.
The damaged area must be opened to assess how far moisture spread. What feels like a small soft spot often extends much farther underneath.
What proper RV floor repair involves
Once damage is confirmed, affected flooring, insulation, and weakened framing must be removed. The structure is rebuilt using materials compatible with RV construction and weight limits. Fastening and bonding methods must allow for movement without future separation.
After structural repair, the finish flooring can be reinstalled or upgraded. This sequence matters. Reversing it leads to repeat repairs.
Slide-outs and floor repair complexity
Floor repairs near slide-outs are especially challenging. Slides rely on precise floor height and smooth surfaces. Even small thickness changes can affect slide alignment, roller pressure, and seal performance.
This is one of the reasons RV floor repair around slides is rarely a simple DIY job.
When repair makes sense and when it doesn’t
Localized floor damage caught early is usually repairable and worth fixing. Widespread damage involving multiple rooms, walls, or slide-outs can exceed the value of the RV, especially on older units.
An honest assessment upfront saves money and frustration.
Why professional RV floor repair matters
RV floors are structural components. Incorrect materials, poor bonding, or ignoring underlying issues often lead to creaks, flexing, and failure within months.
Experienced specialists like Custom-way handle RV floor repair as part of a complete system inspection. They identify the source of damage, rebuild the structure correctly, and ensure floor height, weight, and slide operation remain within proper limits.
This approach prevents repeat failures and protects the RV’s long-term usability.
RV floor repair is not about appearance. It is about restoring strength and stopping further damage. The earlier a soft spot is addressed, the more options exist. Once damage spreads, repairs become invasive and expensive.
If a floor feels wrong underfoot, it usually is. Ignoring it only guarantees a bigger repair later.